What Do I Do With A Flute Head-Joint?
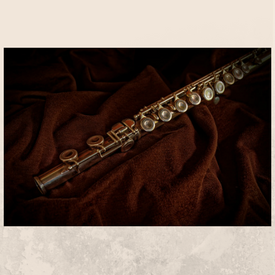
The flute head-joint is one of the three parts which make up the flute.
The answer to the question is: To…

Function of Flute Head-joint
Read further for details on what to do with the flute head-joint.
Production of Sound on the
Flute Head-Joint
In order to produce a sound on the flute head-joint you need to understand Breathing and Embouchure. Read on further for details.
Breathing
You need good breathing patterns to produce a good sound. So you need to be aware of what happens to your body when you breath in and out.
One question I ask beginners is ” What happens to your tummy when you breathe in?”
Most young students answer, ” It goes in. “
Then I ask “What happens to a balloon when you blow air into it?”
They respond with, ” It gets bigger”
Then I explain that air going into a balloon is the same as air going into your lungs so therefore if the balloon gets bigger then the lungs will get bigger and your tummy will go out and in fact your back goes out as well.
I get students to put a hand each on the back and tummy and breathe in. Some still feel the tummy go in and others feel it go out at this stage.
Exercises:
Try these to help you feel the body expanding in all directions.
You can keep your hands on the back and front so you can feel for the expansion of abdomen as you breathe in. The opposite should happen when you breathe out.
Exercise 1: Feeling the open throat “O” sound
- Yawn so you can feel an open throat , like you are saying ‘O’, and breath out slowly through your mouth.
- Breathe:
i. in slowly keeping the ‘o’shape in mouth.
ii. out slowly keeping the ‘o’shape in mouth.
iii. in quickly with a large gasp as if you have been startled by something.
Can you feel the tummy go out and the whole abdomen area expanding?
Exercise 2:
These exercises are good for feeling the length of a long note.
Breathe in for :
- 4 counts…hold breath for 4 counts….breathe out for 4 counts
- 3 counts…hold breath for 4 counts…breathe out for 5 counts
- 6 counts…hold breath for 6 counts…breathe out for 6 counts
- 6 counts…hold breath for 6 counts…breathe in 3 more counts….breathe out for 6 counts
- 2 counts…hold breath for 6 counts…breathe out for 8 counts
Embouchure
The Embouchure is the hole you make in your lips which directs air across the flute to make a sound.
The Embouchure Hole Size
To create this hole you need a hole in the middle, centre of the lips forward and the corners of the lips down like a groper face…which is opposite to smiling. The width of the hole should be no bigger than the width of the hole in the flute head.

Groper Face
To get a good quality, focused sound you want to feel cold air onto your hand. You can feel this by experimenting with different sized embouchure ( mouth ) holes. Remember to breathe in deep and low like in the breathing section above and blow onto your hand. Imagine forming a tube of focused air going into a pinhead sized hole about 5 cm from the lips.
Which sized embouchure hole gives you the coldest feel…..bigger or smaller?
I hope you felt colder air with a smaller hole. This is the embouchure feel you should use when creating a sound on the headpiece.
Direction of Air
Air should follow a direction from ears to the far edge of the flute hole.
The direction of the air is controlled by the jaw placement.
To get a feel for air direction, blow on your hand about 5 cm in front of your mouth and move your jaw forward and back.
Can you feel air land on your hand in different places?
Find a direction of air which comes in a straight line from your ears, passed your mouth and onto your hand. This will be the mouth position for the first sounds produced on the headpiece and full flute.
Putting Embouchure Size and Direction Together
Now practice finding your embouchure size and direction of air by lightly pressing on a finger or the back of the headpiece and blowing across with the centre of the other hand about 5 cm in front of your mouth. Hopefully you will feel cool air on your hand slightly below the centre. If you blow across the flute head-joint then you should get V shape condensation on the surface.
Your First Sounds on the
Flute Head-Joint
With a knowledge of breathing properly and understanding the embouchure hole then it is time to get a sound using the mouth piece alone.
Place the lower lip 1/3 across the flute hole and blow across the hole with the embouchure size and direction as found earlier.
Use a mirror to make sure the width of you hole is no wider than the width of the flute hole.
Was a sound produced?
The process of getting a sound from the flute head-joint can take time and so be patient. You are best to practice in short bursts as often as you like.
Short and Long Sounds on the Flute head-piece
Try playing the following exercises for the number of counts as indicated:
Please note that a sound is when you play and a rest is when you don’t play.
1. 1 count 1 count 1 count 1 count
sound rest sound rest
count 1 1 1 1
2. 2 count 2 count 2 count 2 count
sound rest sound rest
count 1 – 2 1 – 2 1 – 2 1 – 2
3. 3 count 3 count 3 count 3 count
sound rest sound rest
count 1 – 2 – 3 1 – 2 – 3 1 – 2 – 3 1 – 2 – 3
4. 1 count 1 count 2 count 1 count 1 count 2 count
sound sound rest sound rest sound
count 1 1 1 – 2 1 1 1 – 2
Try any other long and short combinations of sounds and rests.
Different Sounds on the Head-Joint Alone
You can have fun getting different sounds with the flute head-joint alone.
Have a go at finding them by:
Playing a long note and whilst continuing to play this note:
1. roll the head-joint in
2. roll the head-joint out
Do the notes stay the same or go lower or higher?
Now try:
- Putting your finger in and out of the end of the head-joint while you play
2. Putting your palm over the end while you play
What happens to the notes?
Try playing some well-known pieces using these lower and higher sounds.
Putting The Three Flute Pieces Together
The flute has three sections:

You need to be careful when putting the flute together that you don’t touch the keys or surrounding areas, as you may damage it.
So here is how you put the flute together carefully
- Hold the flute head-joint in the left hand with the open end facing to the right.
- Hold the flute body-joint in the right hand around the barrel which is the area with the writing on and facing left.
- Place the end of the flute head-joint into the barrel and gently twist the two together lining up the blow hole with the first key on the flute body-joint.
- Now hold the flute body-joint in the left hand around the barrel with the open end facing right and twist the flute foot-joint onto it making sure you don’t touch any keys. The rod on the foot- joint should be placed approximately in line with the centre of the last key on the main body-joint.
You can read Here for other details on assembling the flute and general flute care.
Making a Sound With the Full Flute
When your flute is together it is time to play it blowing across the flute hole as you did with the flute head-joint alone.
To begin with get a feel of the length of the flute and hold the flute anywhere so that the open end is facing towards the right. Then blow across the blow hole on the flute head-joint as you have done earlier to make a sound. Play long and short sounds.
Now you need to learn how to hold and balance the flute properly so that you can cover the keys in various configurations to change the pitch of the sound.
Take a look at the picture below of me holding and fingering a note on my flute. And try and duplicate how the hands are placed.
The left fingers cover the keys nearest the head-joint and the right fingers cover the keys further away. The flute goes at an angle away from the body ie it is not going to be parallel with your body and is slightly down ie it is not going to be parallel to a flat ceiling. The main aim is for your lips to be parallel to the blow hole.

Holding the Flute
Your balance points are the lips on the flute head-joint blow hole, the left hand touching the flute at the base of the first finger and the right hand thumb underneath the flute. You get extra balance points when the left hand thumb is on the key underneath the flute and the right hand little finger is on a key on the foot-joint. And the left hand thumb and right hand little finger are used for many notes.
The next stage is to learn the notes and the various fingering combinations so that you can play any desired piece for fun and relaxation.
So you now know what to do with the flute head-joint.
Go forth and play around with
Sound Production
with the head-joint on it’s own
or
assembled as a complete flute
If you need help with any of this please contact me here.