Flute Care
When you learn the flute or piccolo flute care is important. There are ways you can look after it to keep it in good condition. Read on further for three Instructions on Flute Care .
1. Assembling The Instrument
It is wise to adhere to good flute care when assembling the flute. Why?
The major cause of flute malfunction and breakdown is the direct result of mishandling the instrument. Frequently keys become bent and pads unseated when performers assemble their flutes by unnecessarily gripping the keys and rods.
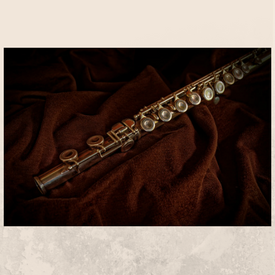
Sections of the Flute

The Flute has Three Sections
Head Joint Body Joint Foot Joint
A piccolo is a small flute and sounds one octave higher.
In this article the word Flute will refer to flute and piccolo.
Assembling the flute
When assembling the flute grip the parts where there are no keys to avoid damage to the mechanism. Hold the instrument firmly and slowly rotate the parts to join them together in a twisting motion. If the joints are tight wipe the joints and socket with a clean, dry cloth. The embouchure ( blow hole ) on the head joint should be closely aligned with the first key on the main body. The rod on the foot joint should be placed approximately in line with the centre of the last key on the main body.
Please note:
~ that if keys are pressed too hard then pads might be affected.
~ that if you must leave your flute for any reason whilst it is assembled, then rest it on a soft surface where it wont be knocked with keys facing upwards. Never lay your flute key-side down.
Alternatively you can purchase a flute stand to hold your flute safely whilst it is out and not being played.
2. Cleaning Your Flute
The flute must be cleaned after each use because the moisture will collect dust and dirt and could also rust those parts of the mechanism which are not silver or nickle eg the steel rods.
Care of the Interior
After playing, any fluid on the pads can cause irregular contraction, which in turn can adversely affect the sound. To prevent this the interior needs to be cleaned thoroughly.
For this you need:
a cleaning rod:
These come with a flute when you purchase one.
Or you can buy them separately.
cleaning cloth:
This needs to be big enough to cover the whole cleaning rod including the tip, so that you can hold one end of the cloth in your hand, preventing it from scratching the bore and to bunch up and get jammed in the bore. A large man’s hankerchief will do the job.
Silk is recommended over other fabrics because it will not leave any lint in the bore.
You can find cleaning cloth options here.
Instructions for cleaning flute with cloth
- Thread the cleaning cloth through the eye of the cleaning rod.
2. Cover the cleaning rod including the rod tip.
3. Swab each of the three sections of the flute until dry.
With the head and foot joints insert the rod and cloth into the bore and twist the rod and cloth around; then remove.
With the flute body, insert into each end and twist the rod and cloth round; then remove. Do not insert all the way through and then pull it out as the cloth may get stuck inside the bore.
4. Once finished take the cleaning cloth out from the rod and put the rod away in the flute case. The cleaning cloth should not be kept in the flute case as it will be wet and wet cloths within a tight case can provide enough moisture to cause the steel rods of the mechanism to rust.
Care of the Exterior
This is to keep the outside of the flute polished and the pads in good condition.
You need
1. clean polishing cloth
All you do is wipe any dirt, moisture, fingerprints from the keys of the flute after playing before putting it away in the flute case. Take care not to rub the edges of the pads as this will damage the pad skins.
Please note: Never use liquid silver polish as this will clog the mechanism.
2. Thin Absorbent Paper
After playing and while the pads are still wet, insert a piece of thin absorbent paper between the pads and the tone holes. Press lightly on the the pads and carefully remove the paper. Repeat this two or three times.
You can buy flute cleaning kits which have everything you need to maintain your flute. Flute care couldn’t be easier with a flute cleaning kit.
3. Storing The Instrument
The case should always be used for storing the instrument after playing and for transporting it. The case is airtight to prevent dirt and dust from entering as well as to protect the pads and keys from temperature and humidity changes. and to keep the instrument clean and to prevent damage. Do not put anything in the case which might put pressure on the instrument eg cleaning cloth. Periodically clean the inside of the case to avoid dirt from building up and getting into the instrument.
To top off your flute care it is recommended to have your flute serviced once a year to keep it in good playing condition.
Conclusion
Maintain your flute using the three Flute Care Instructions